


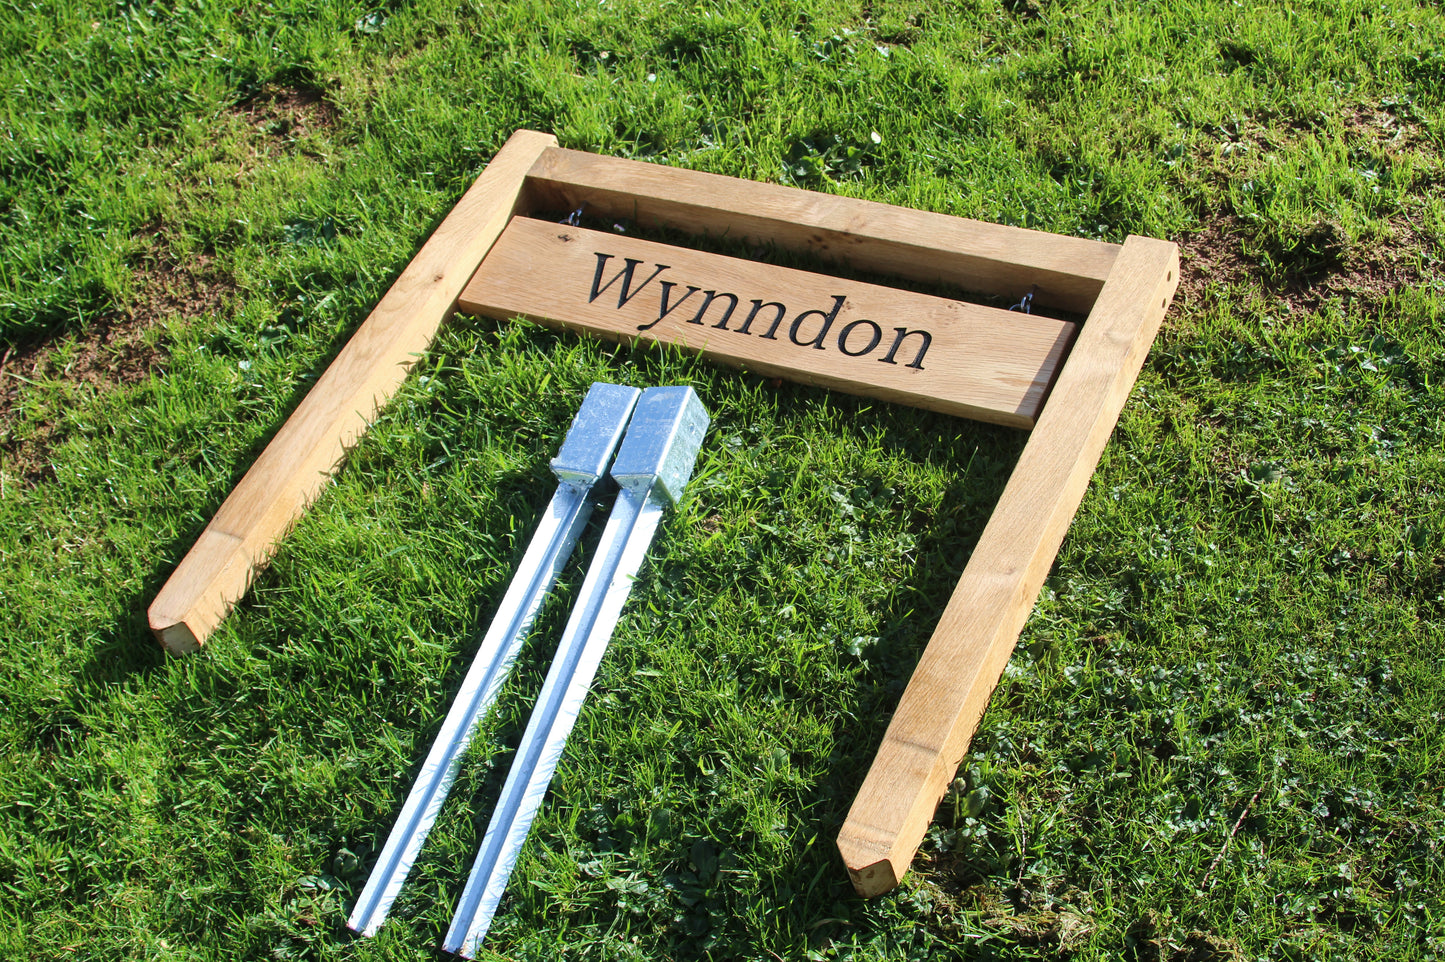
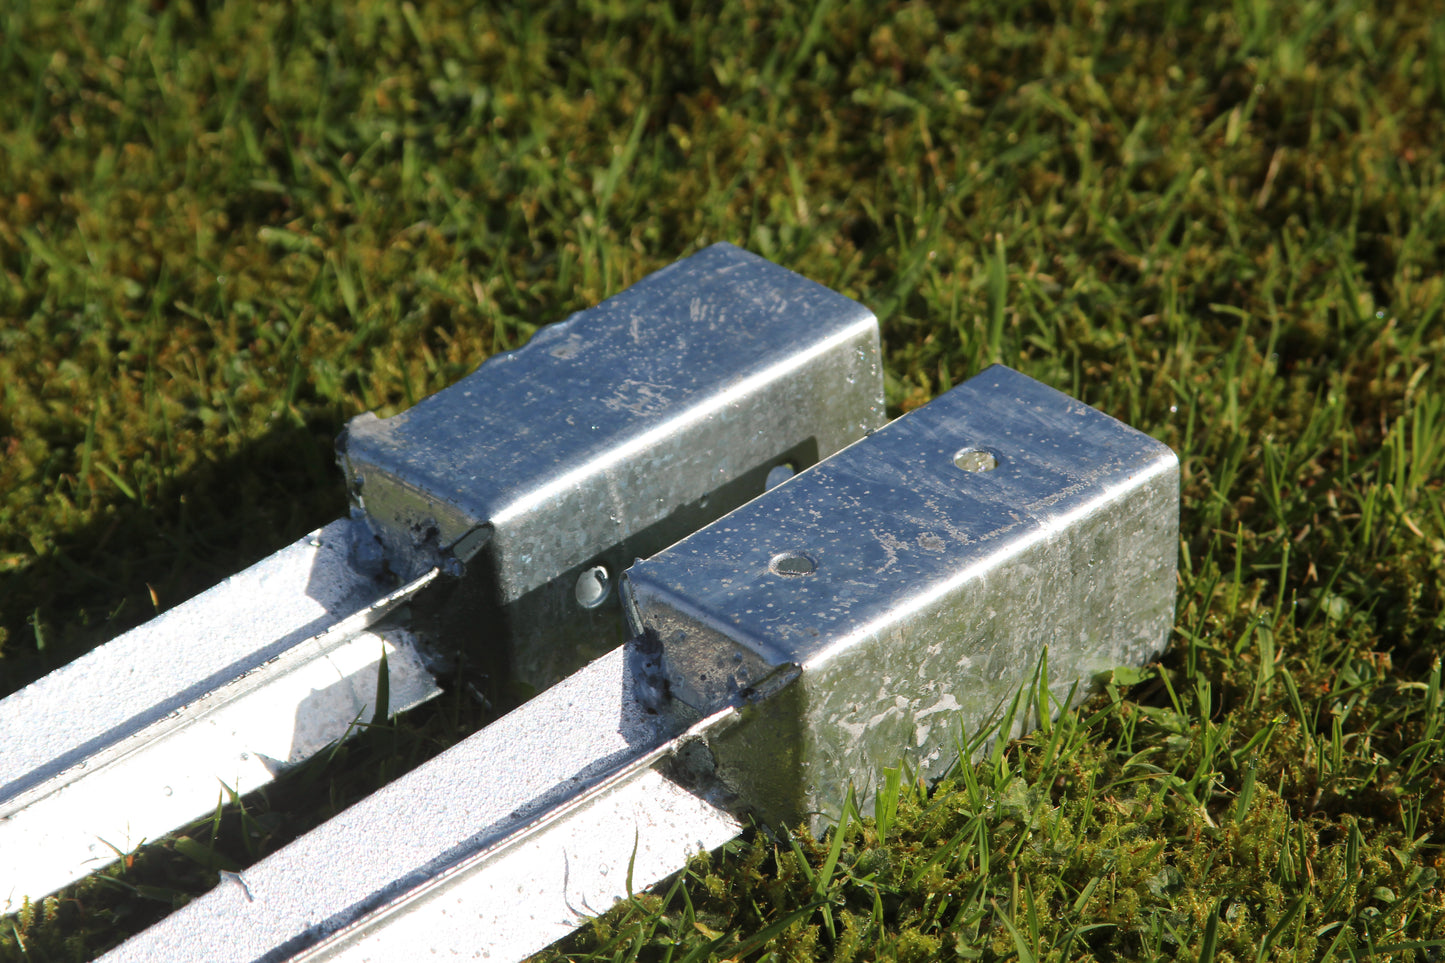
G-Spikes – Ground Spikes for Easy and Secure Post Installation
G-Spikes – Ground Spikes for Easy and Secure Post Installation
Couldn't load pickup availability
- Sustainably Sourced
- Handmade in Devon
- Bespoke Designs
G-Spikes – Ground Spikes for Easy and Secure Post Installation
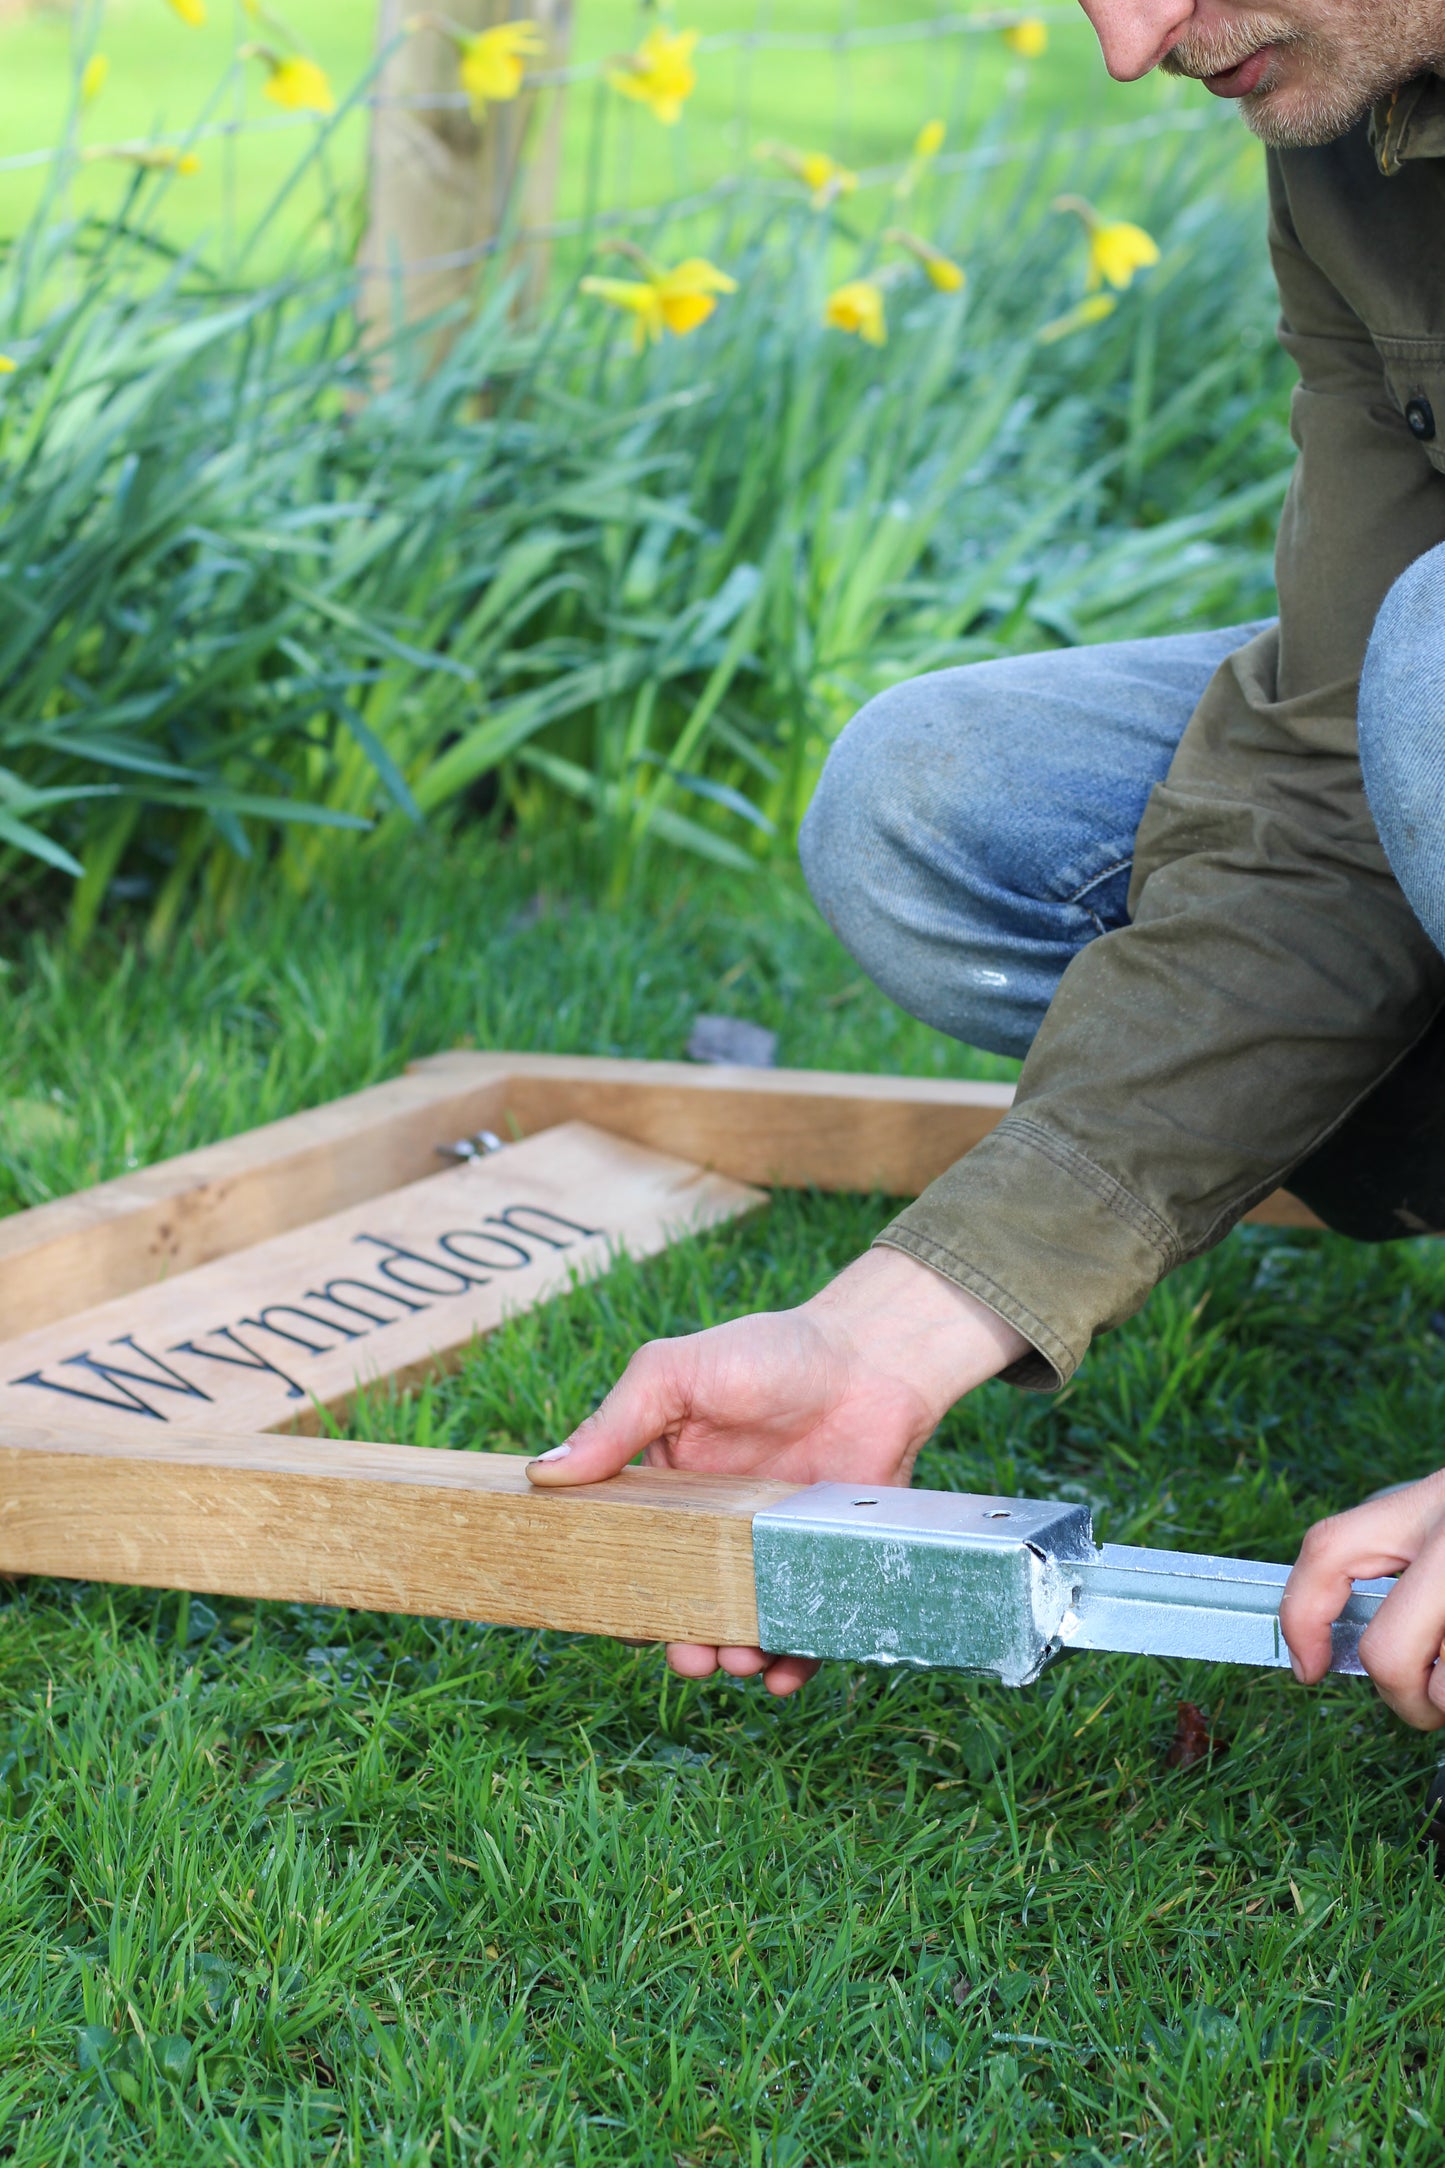
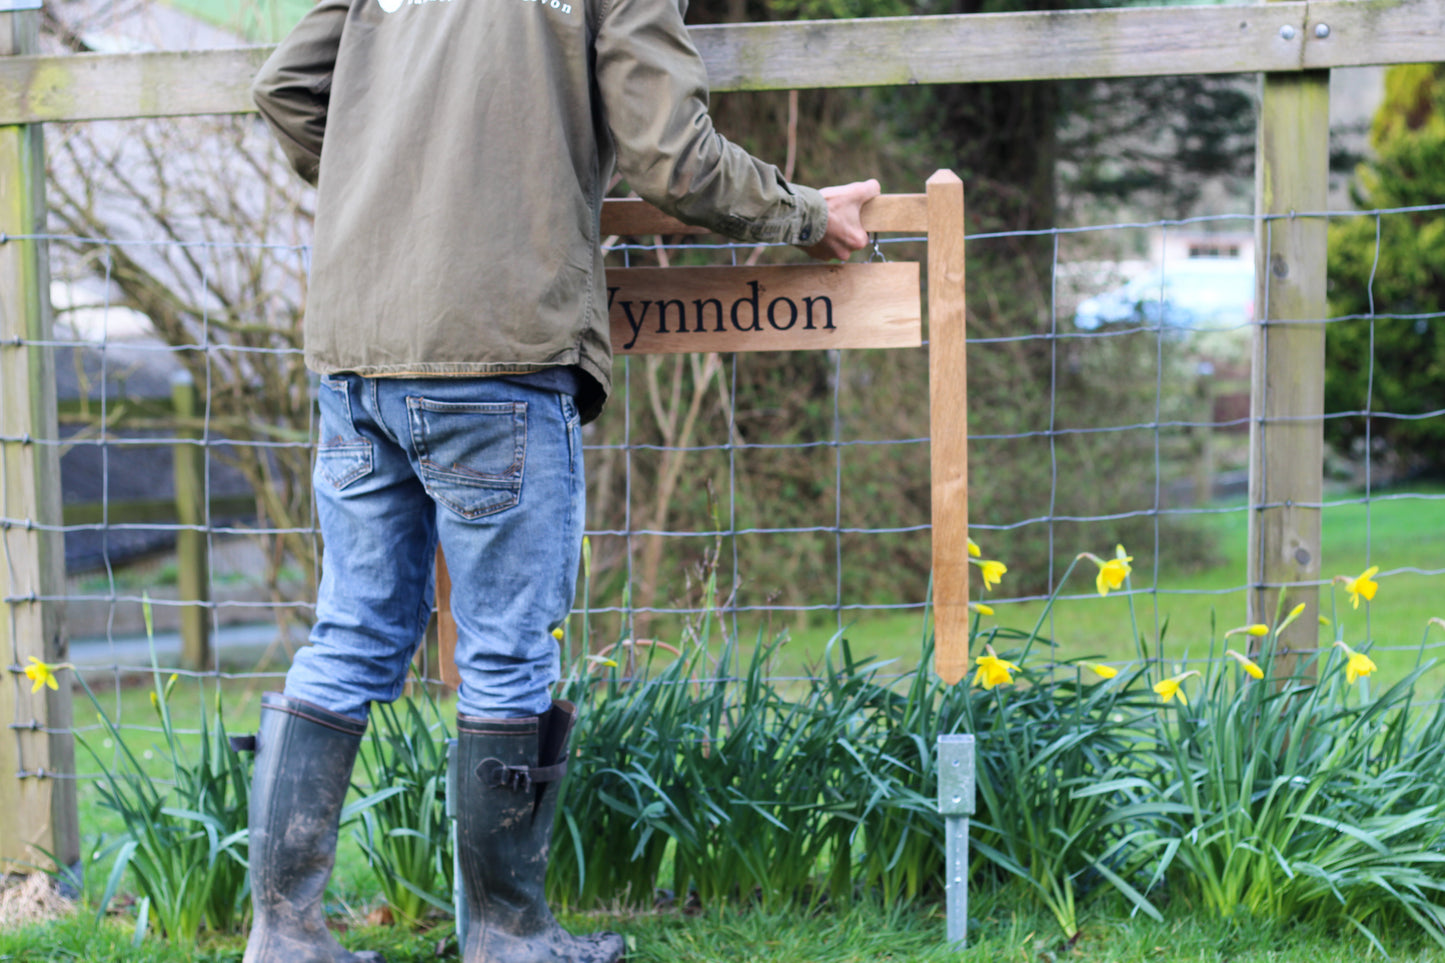
Our G-Spikes are designed to make wooden post installation quick, stable, and long-lasting.
Key Features:
- Enhanced Stability – Keeps posts securely in place.
- Easy Installation – Simply drive the spike into the ground and insert the post.
- Wood Protection – Helps prevent rot by keeping wood elevated from direct ground contact.
Available Sizes:
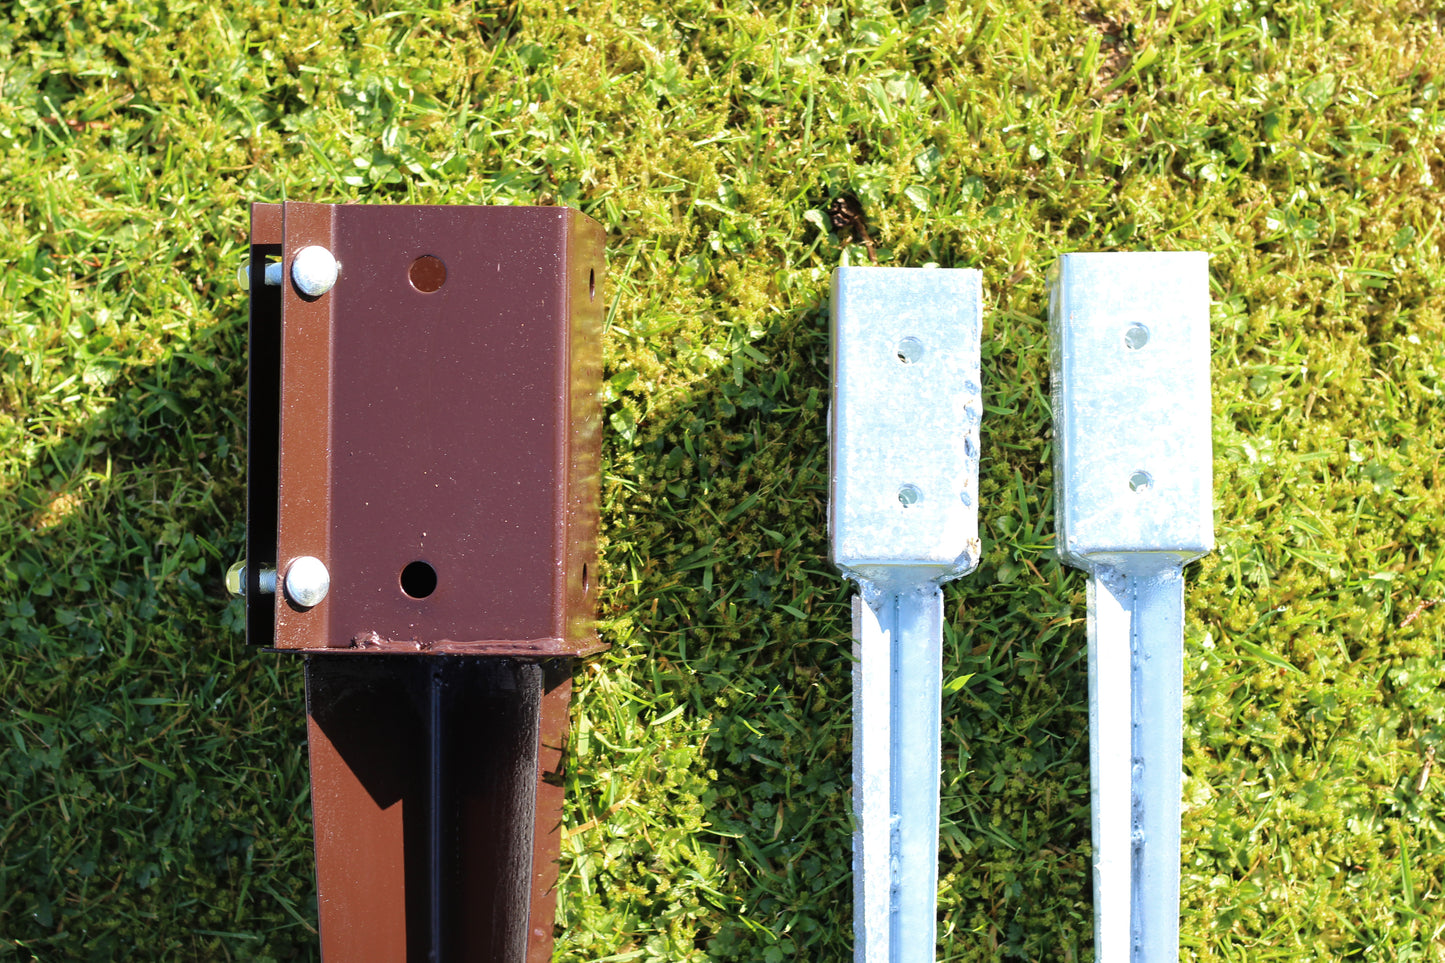
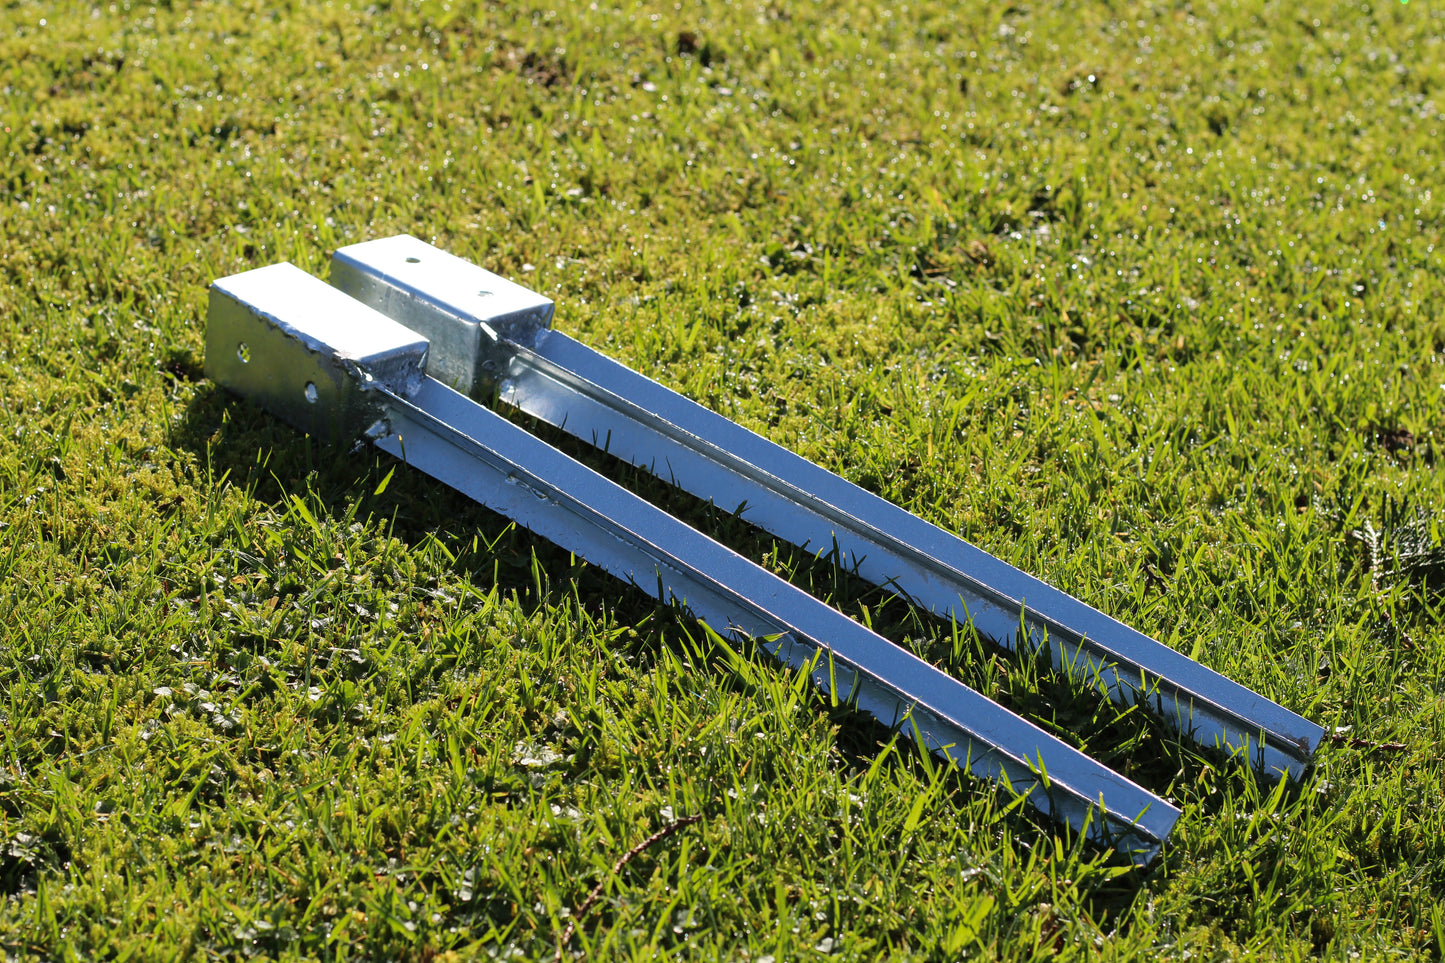
- Large G-Spike – Fits 9cm x 9cm posts with a 70cm spike, ideal for larger signage.
- Small G-Spike – Designed for 5cm x 5cm posts with a 55cm spike, perfect for two-post signs.
A reliable, durable, and effective solution for all your signage needs!
- We provide all the necessary fittings to install your ground spike and securely attach your sign.
- Easy Installation - See Our FAQ's
Materials & Finish
Our G-Spikes are built for durability and long-term outdoor use.
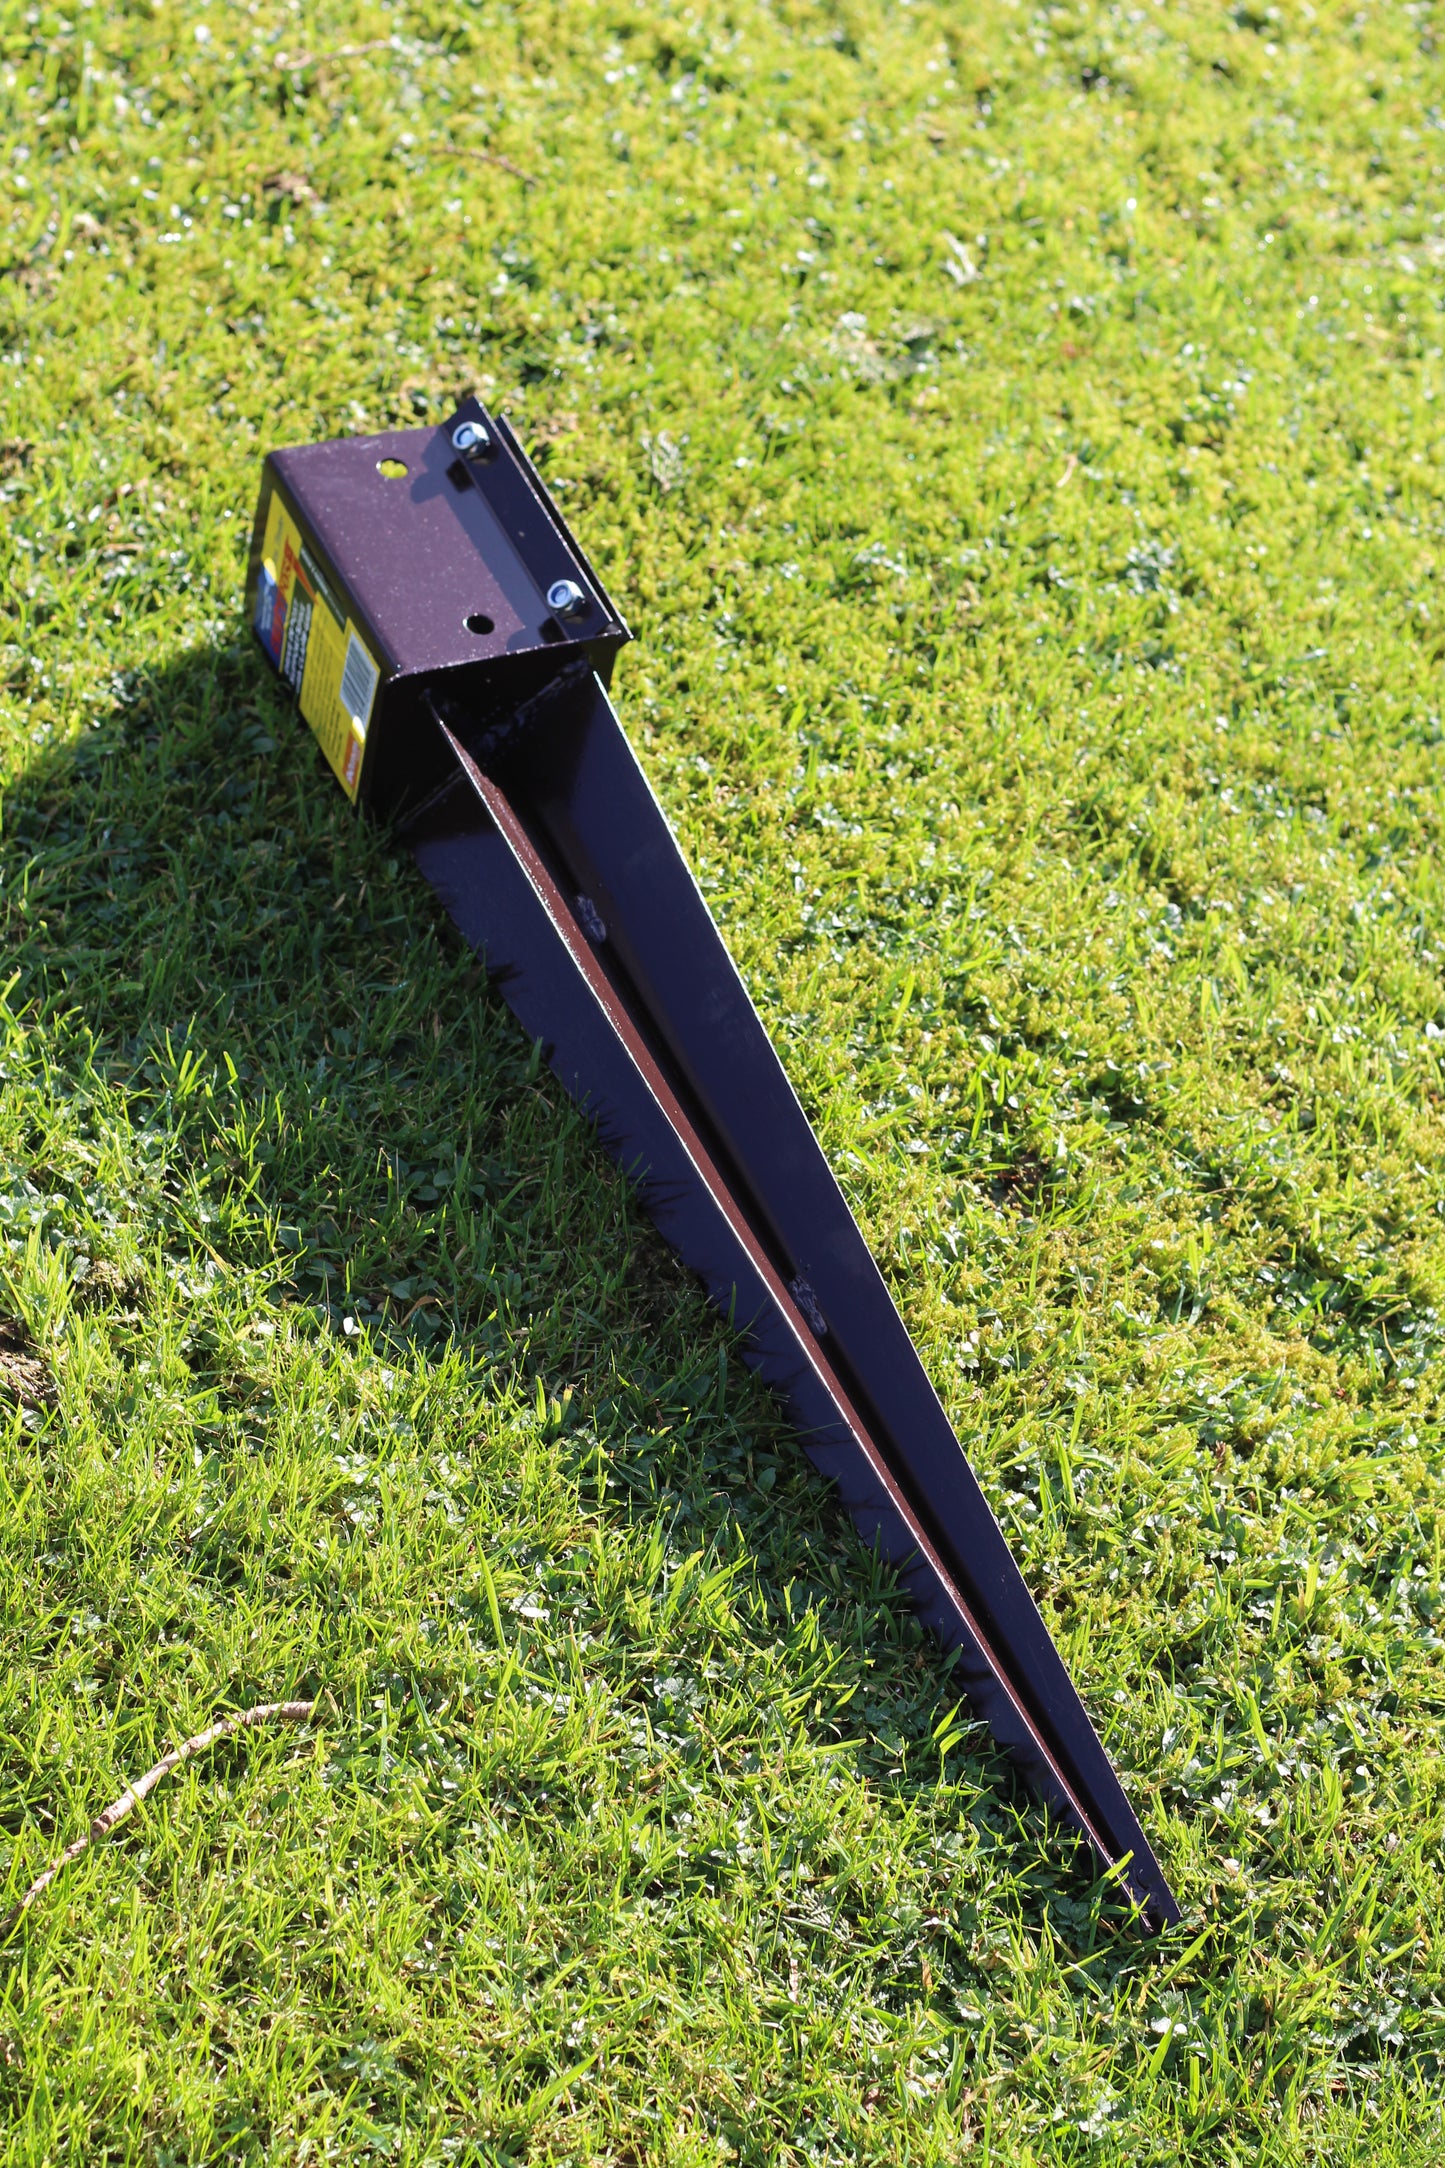
- Large G-Spike (70cm) – Coated with Epoxy Brown for a weather-resistant and rust-resistant finish, blending seamlessly with wooden posts.
- Small G-Spike (55cm) – Galvanised steel for superior corrosion protection, ensuring long-lasting performance in all weather conditions.
Both options provide strong, reliable support for your signage while protecting the wood from ground moisture.
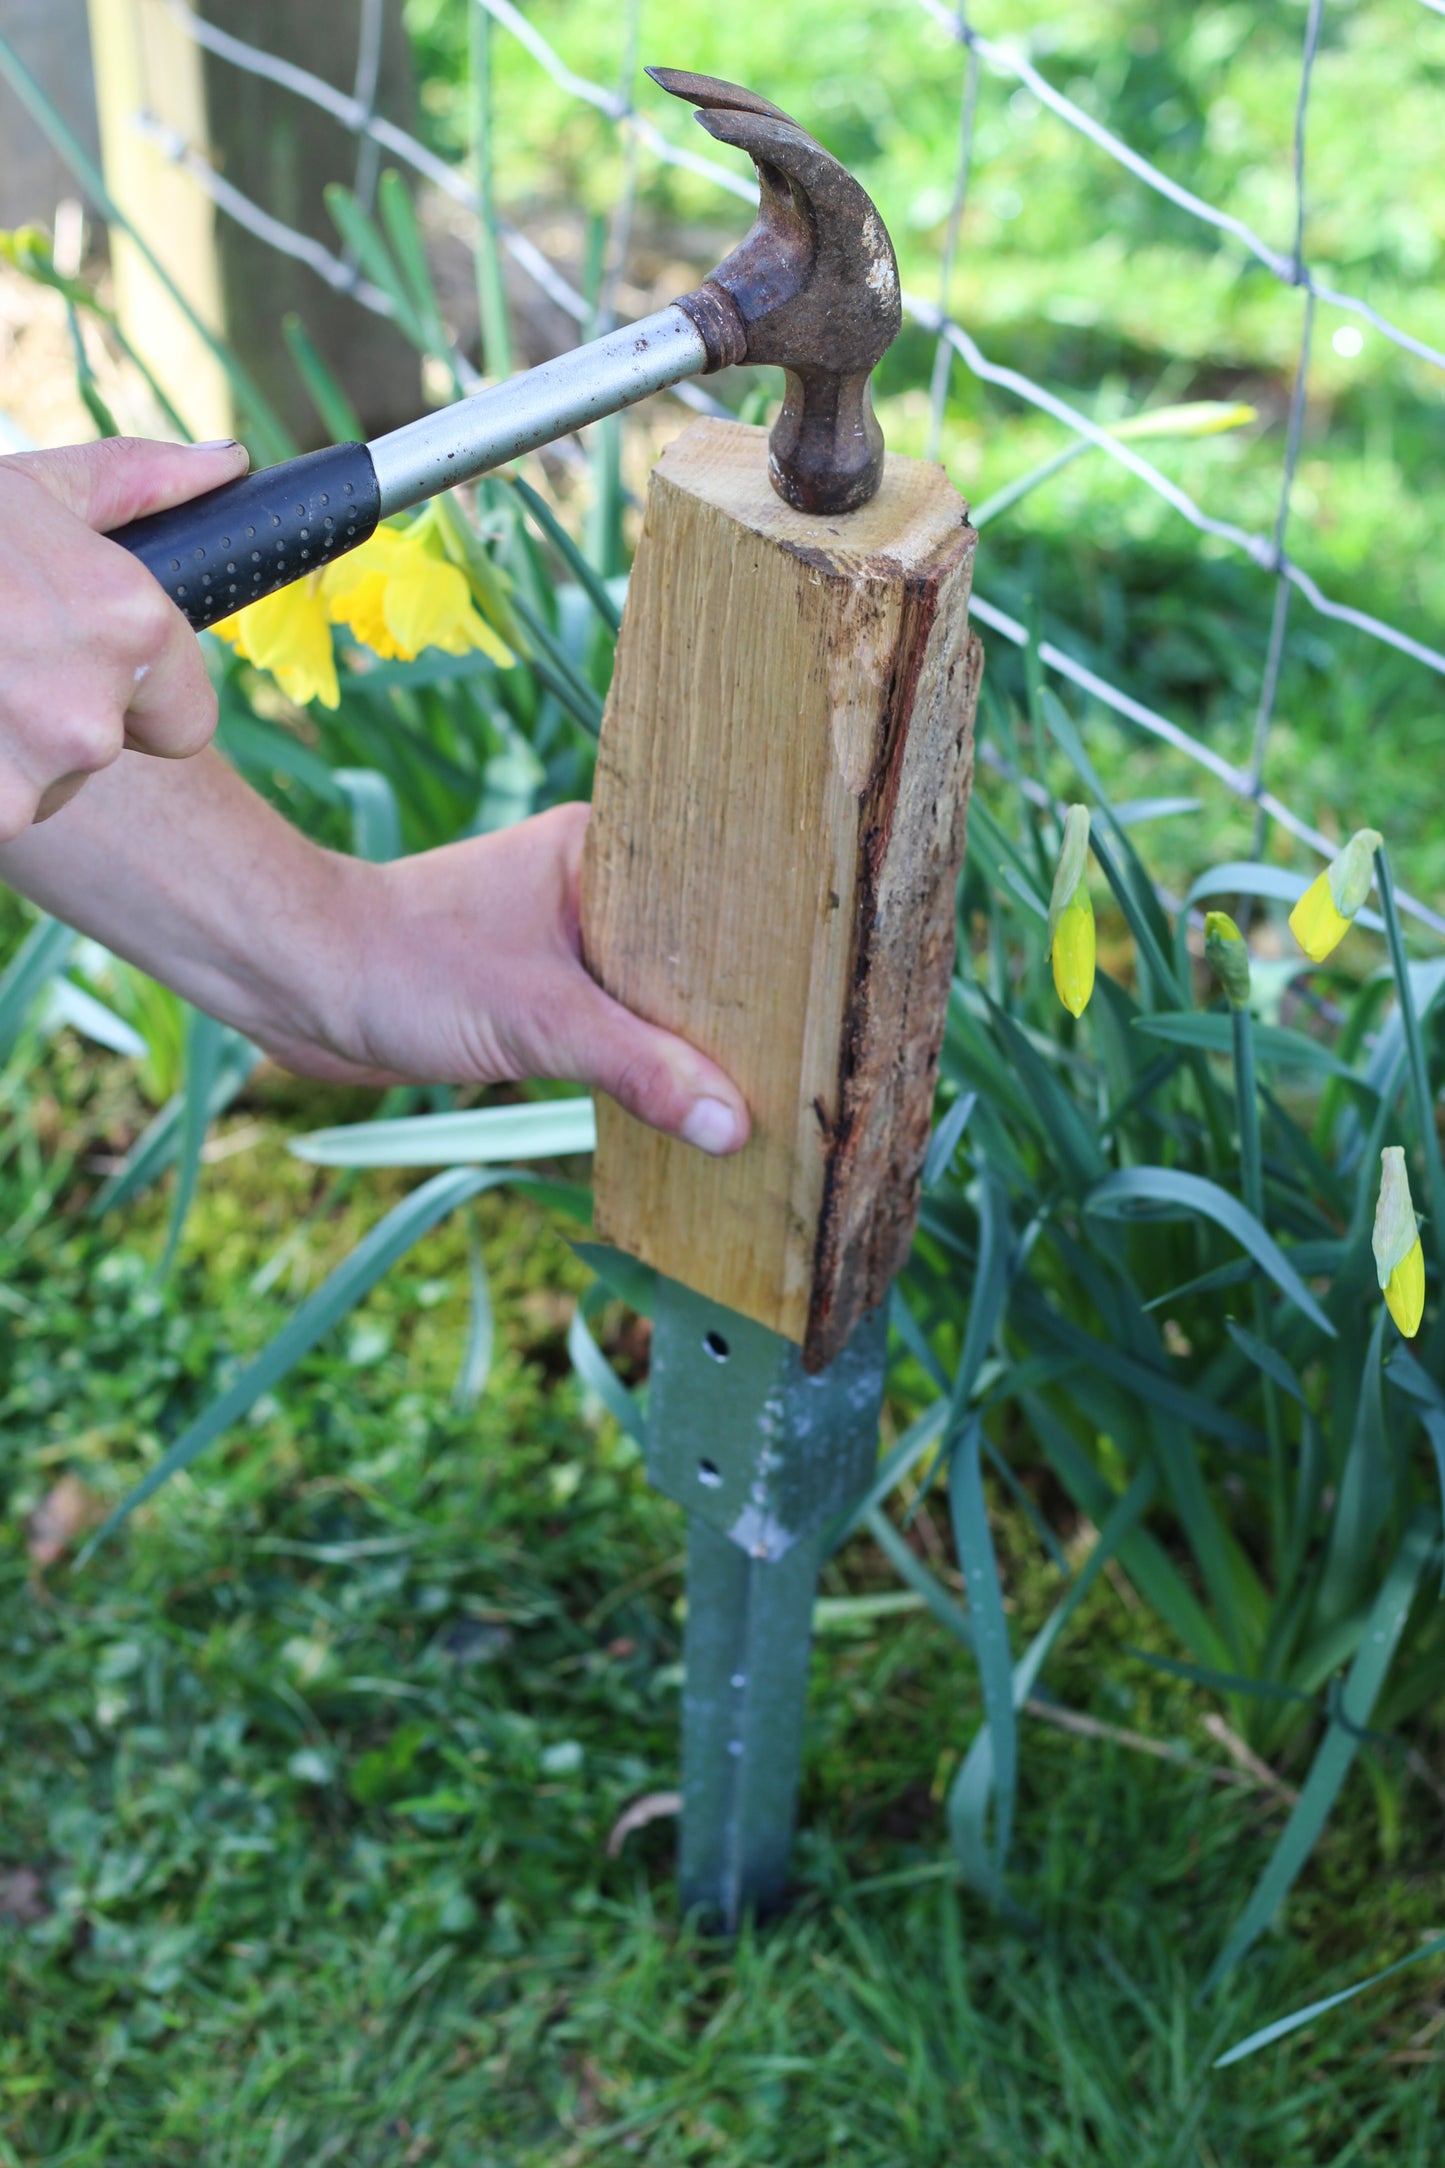
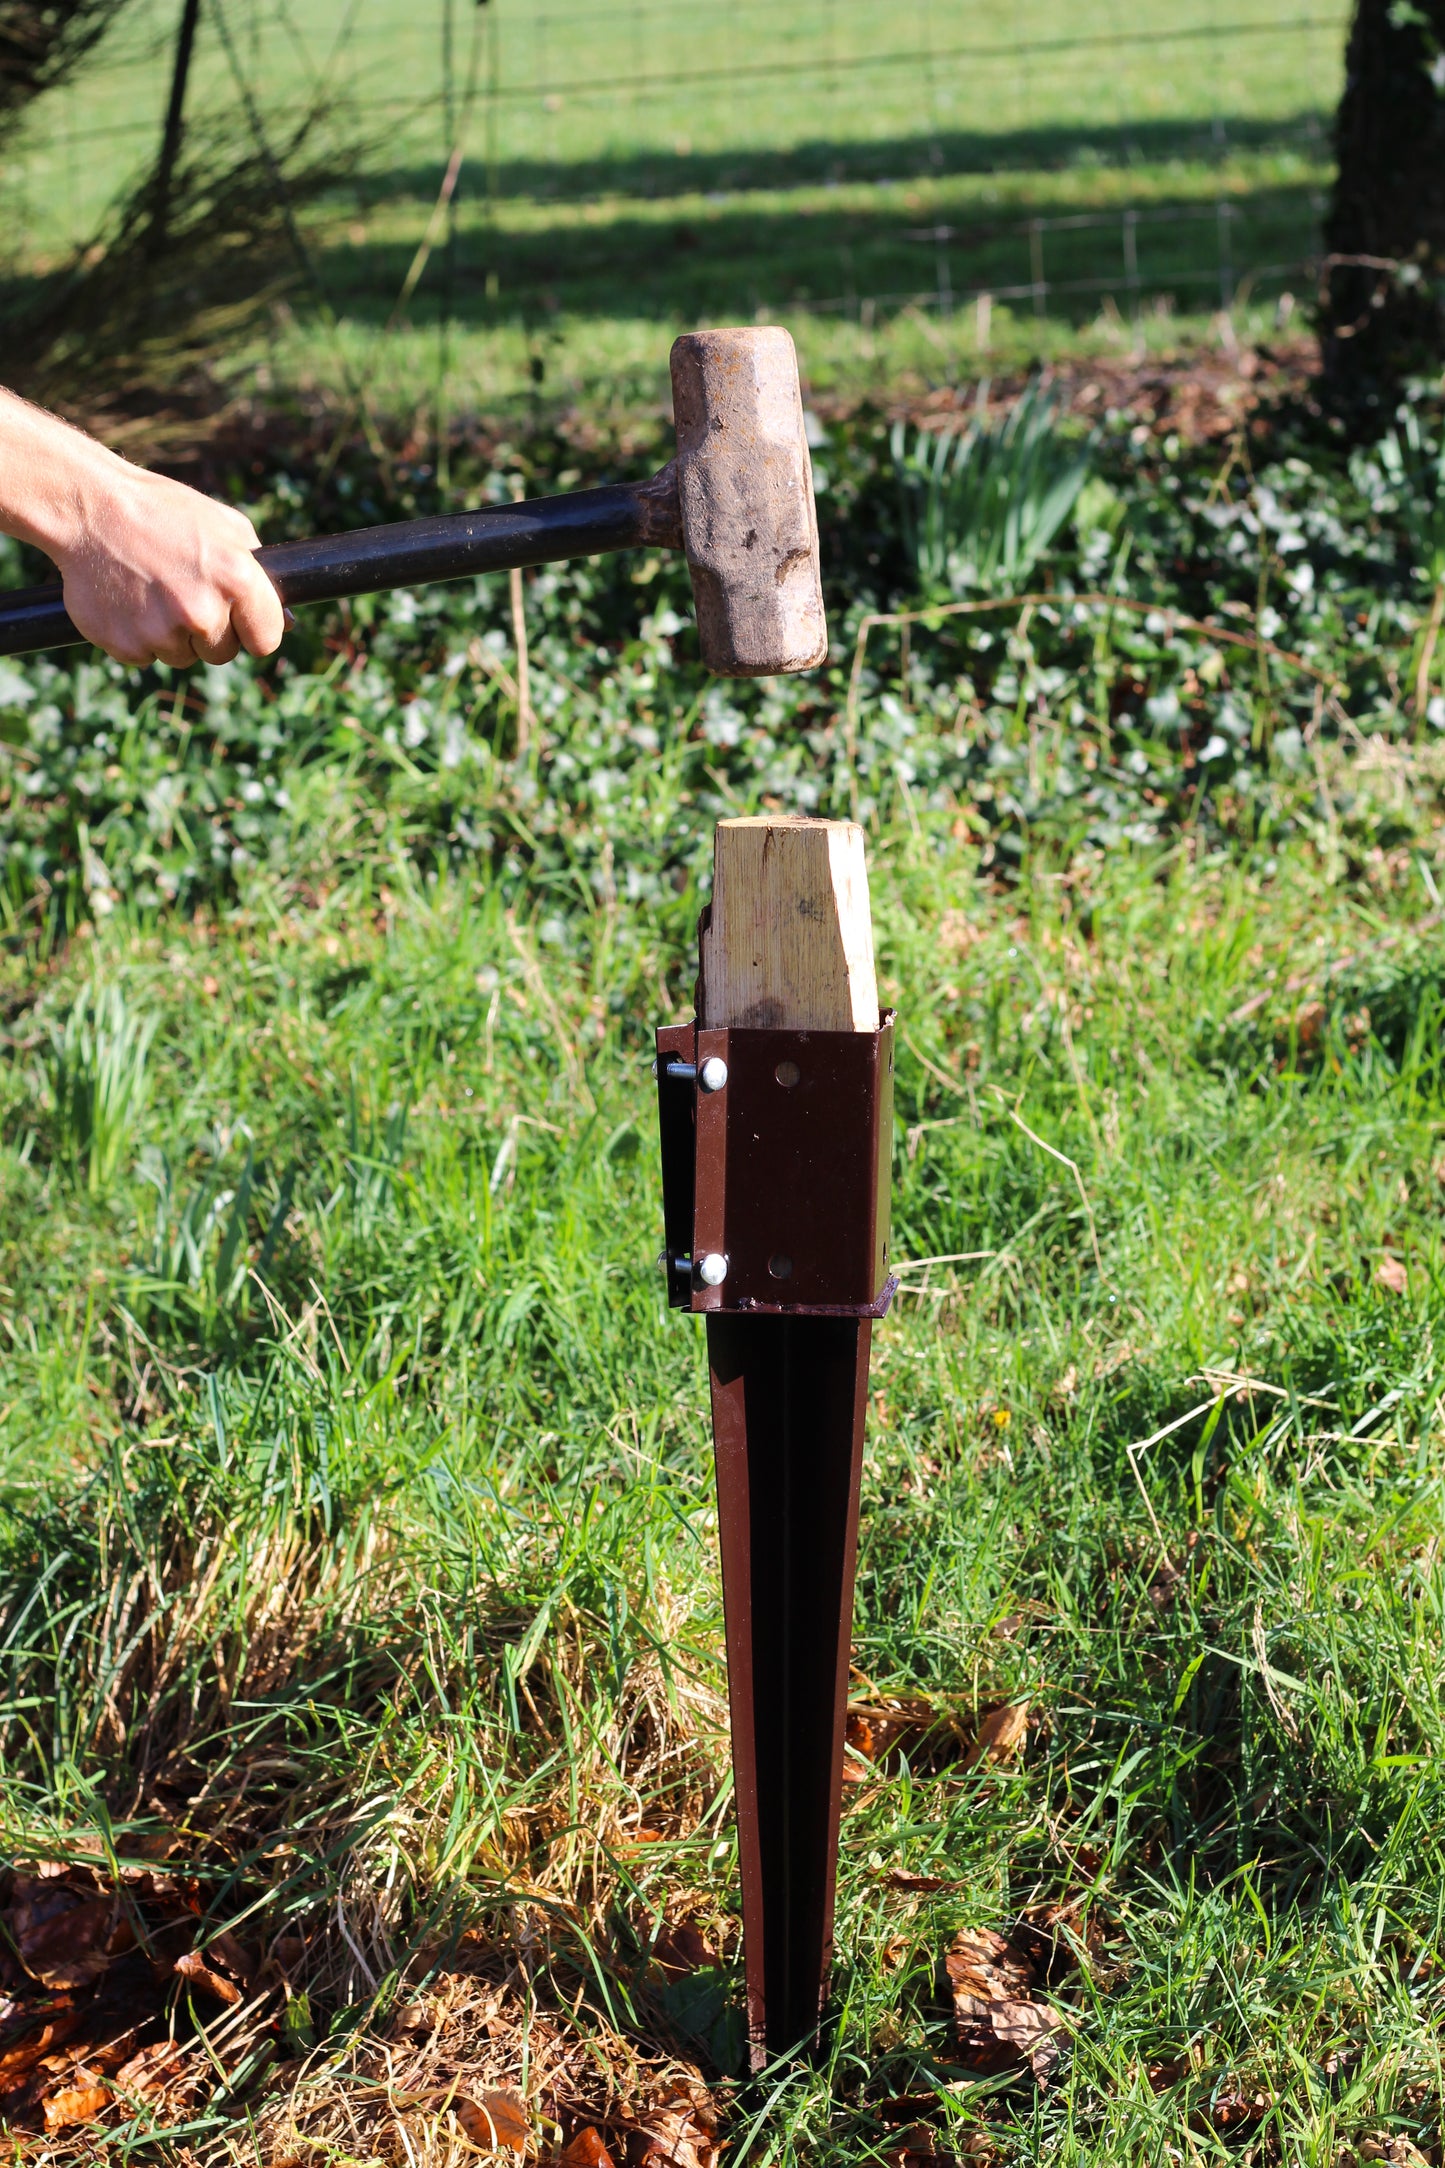
How to Install a Ground Spike for a Wooden Post
See our full blog and video for our step by step guide
Tools Needed:
- Rubber mallet or hammer
- Wooden block (to protect the spike)
- Measuring tape (for two-post installations)
- Screwdriver
- Bolts or screws (provided with the ground spikes)
Step-by-Step Guide:
-
Choose a Suitable Location
- Find a flat, stable area with firm soil. Avoid overly soft or rocky ground.
-
Position the Ground Spike
- Place the spike in the desired spot, ensuring it is upright.
-
Drive the Spike into the Ground
- Use a wooden block on top of the spike to prevent damage.
- Gently hammer the block with a mallet or hammer until the spike is secure.
-
For Two-Post Installations:
- Position both spikes before inserting the posts.
- Place the spikes on the ground where needed and lightly press them to create indentations in the soil.
- Measure the distance between indentations to ensure correct spacing before securing the spikes into the ground.
-
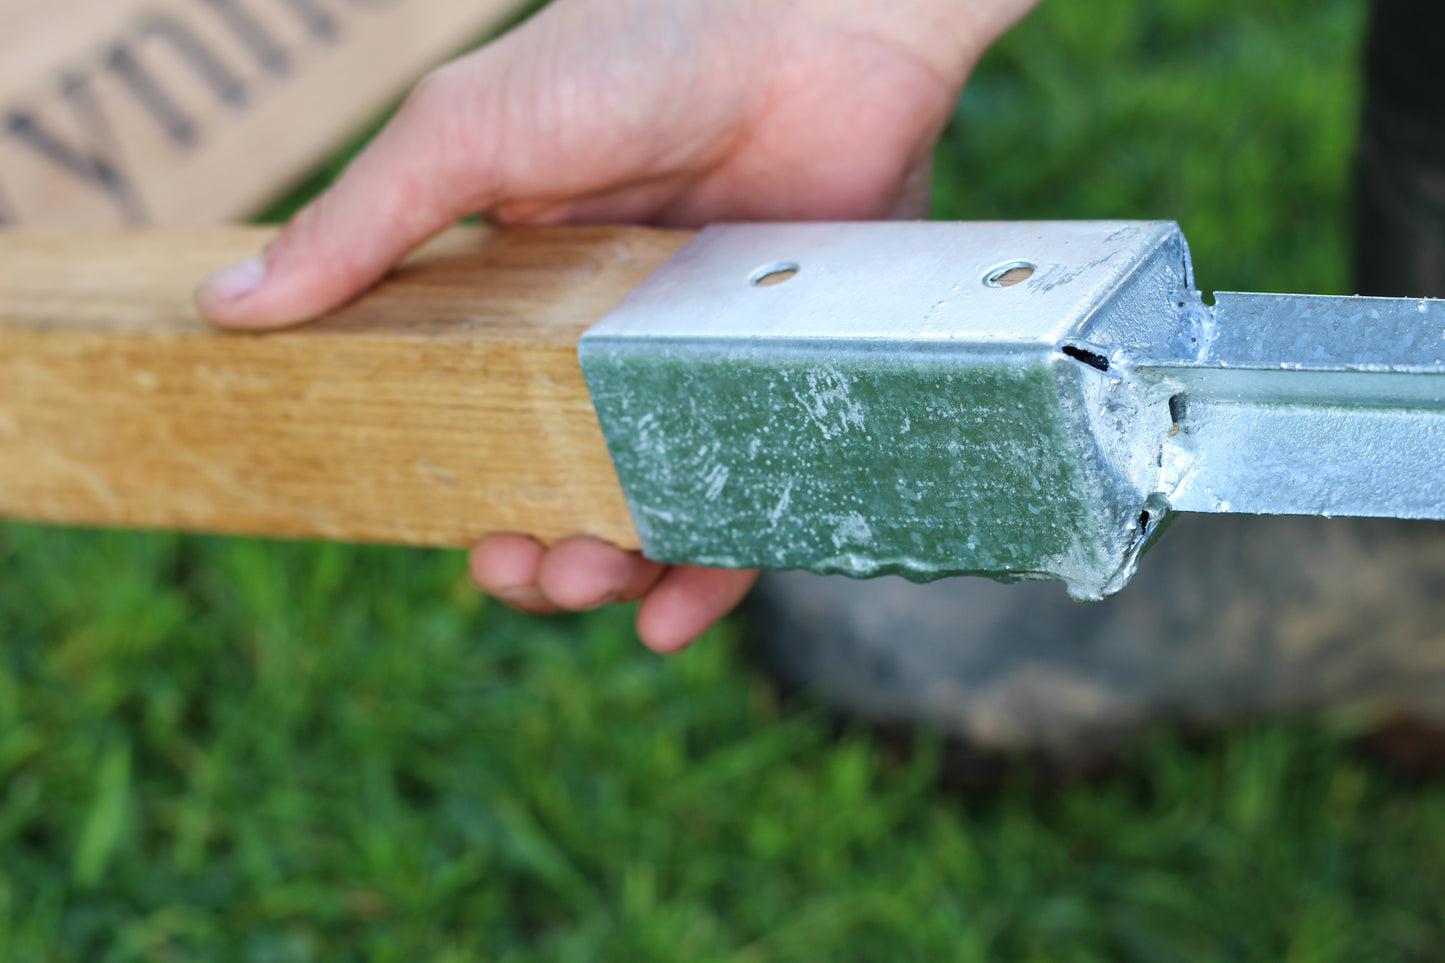
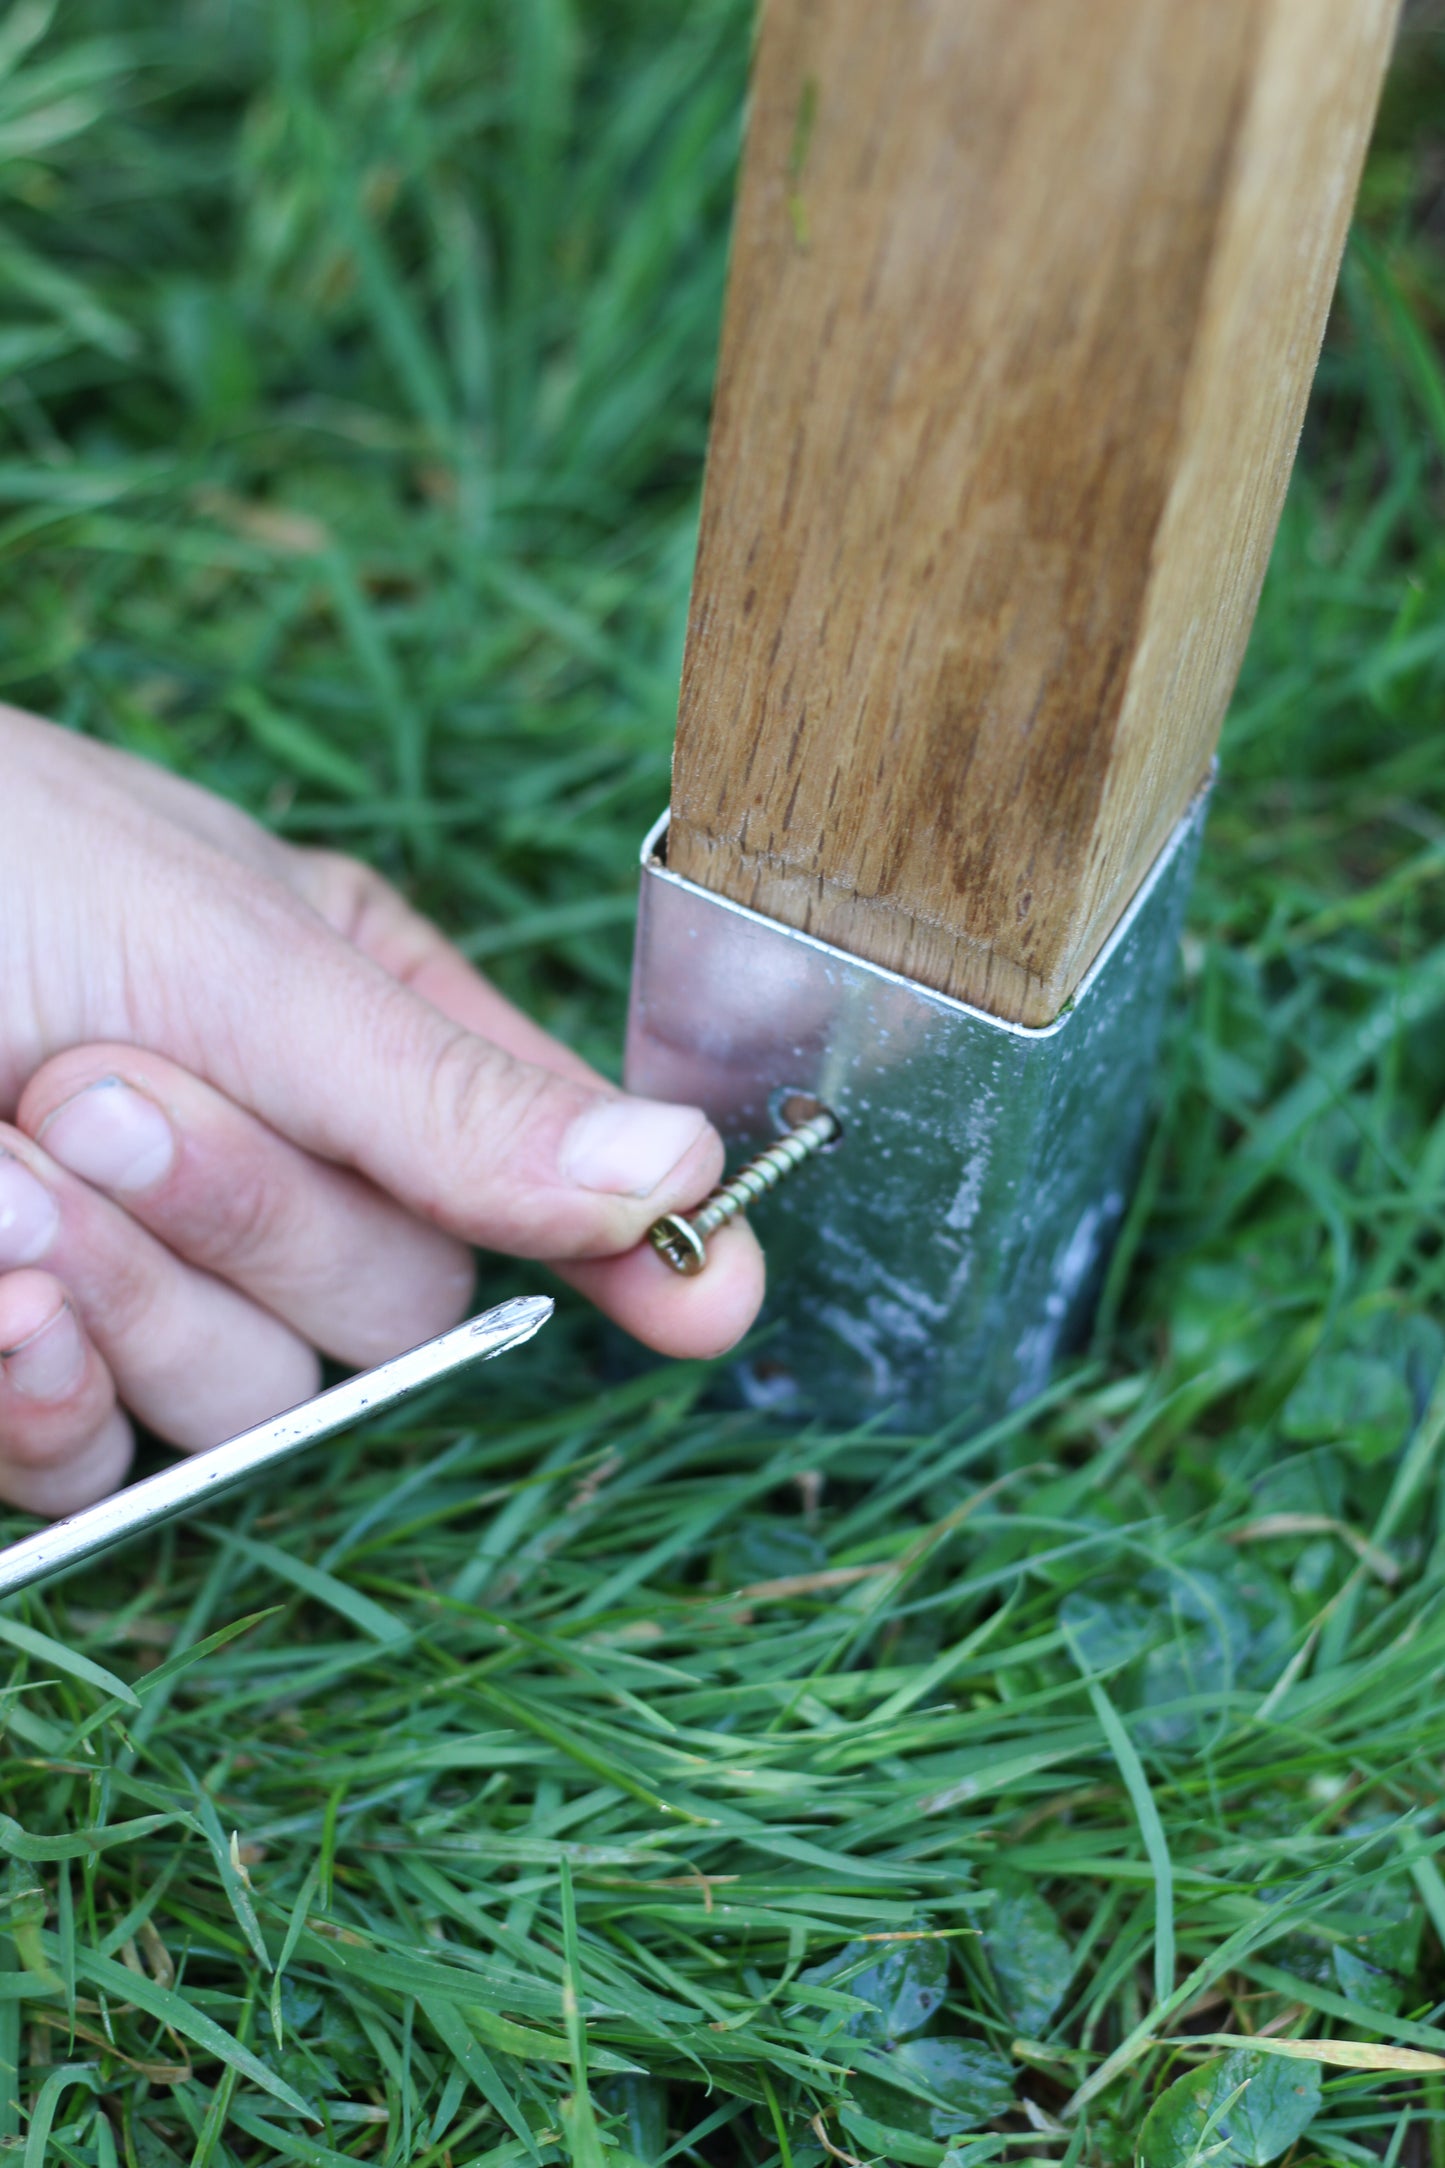
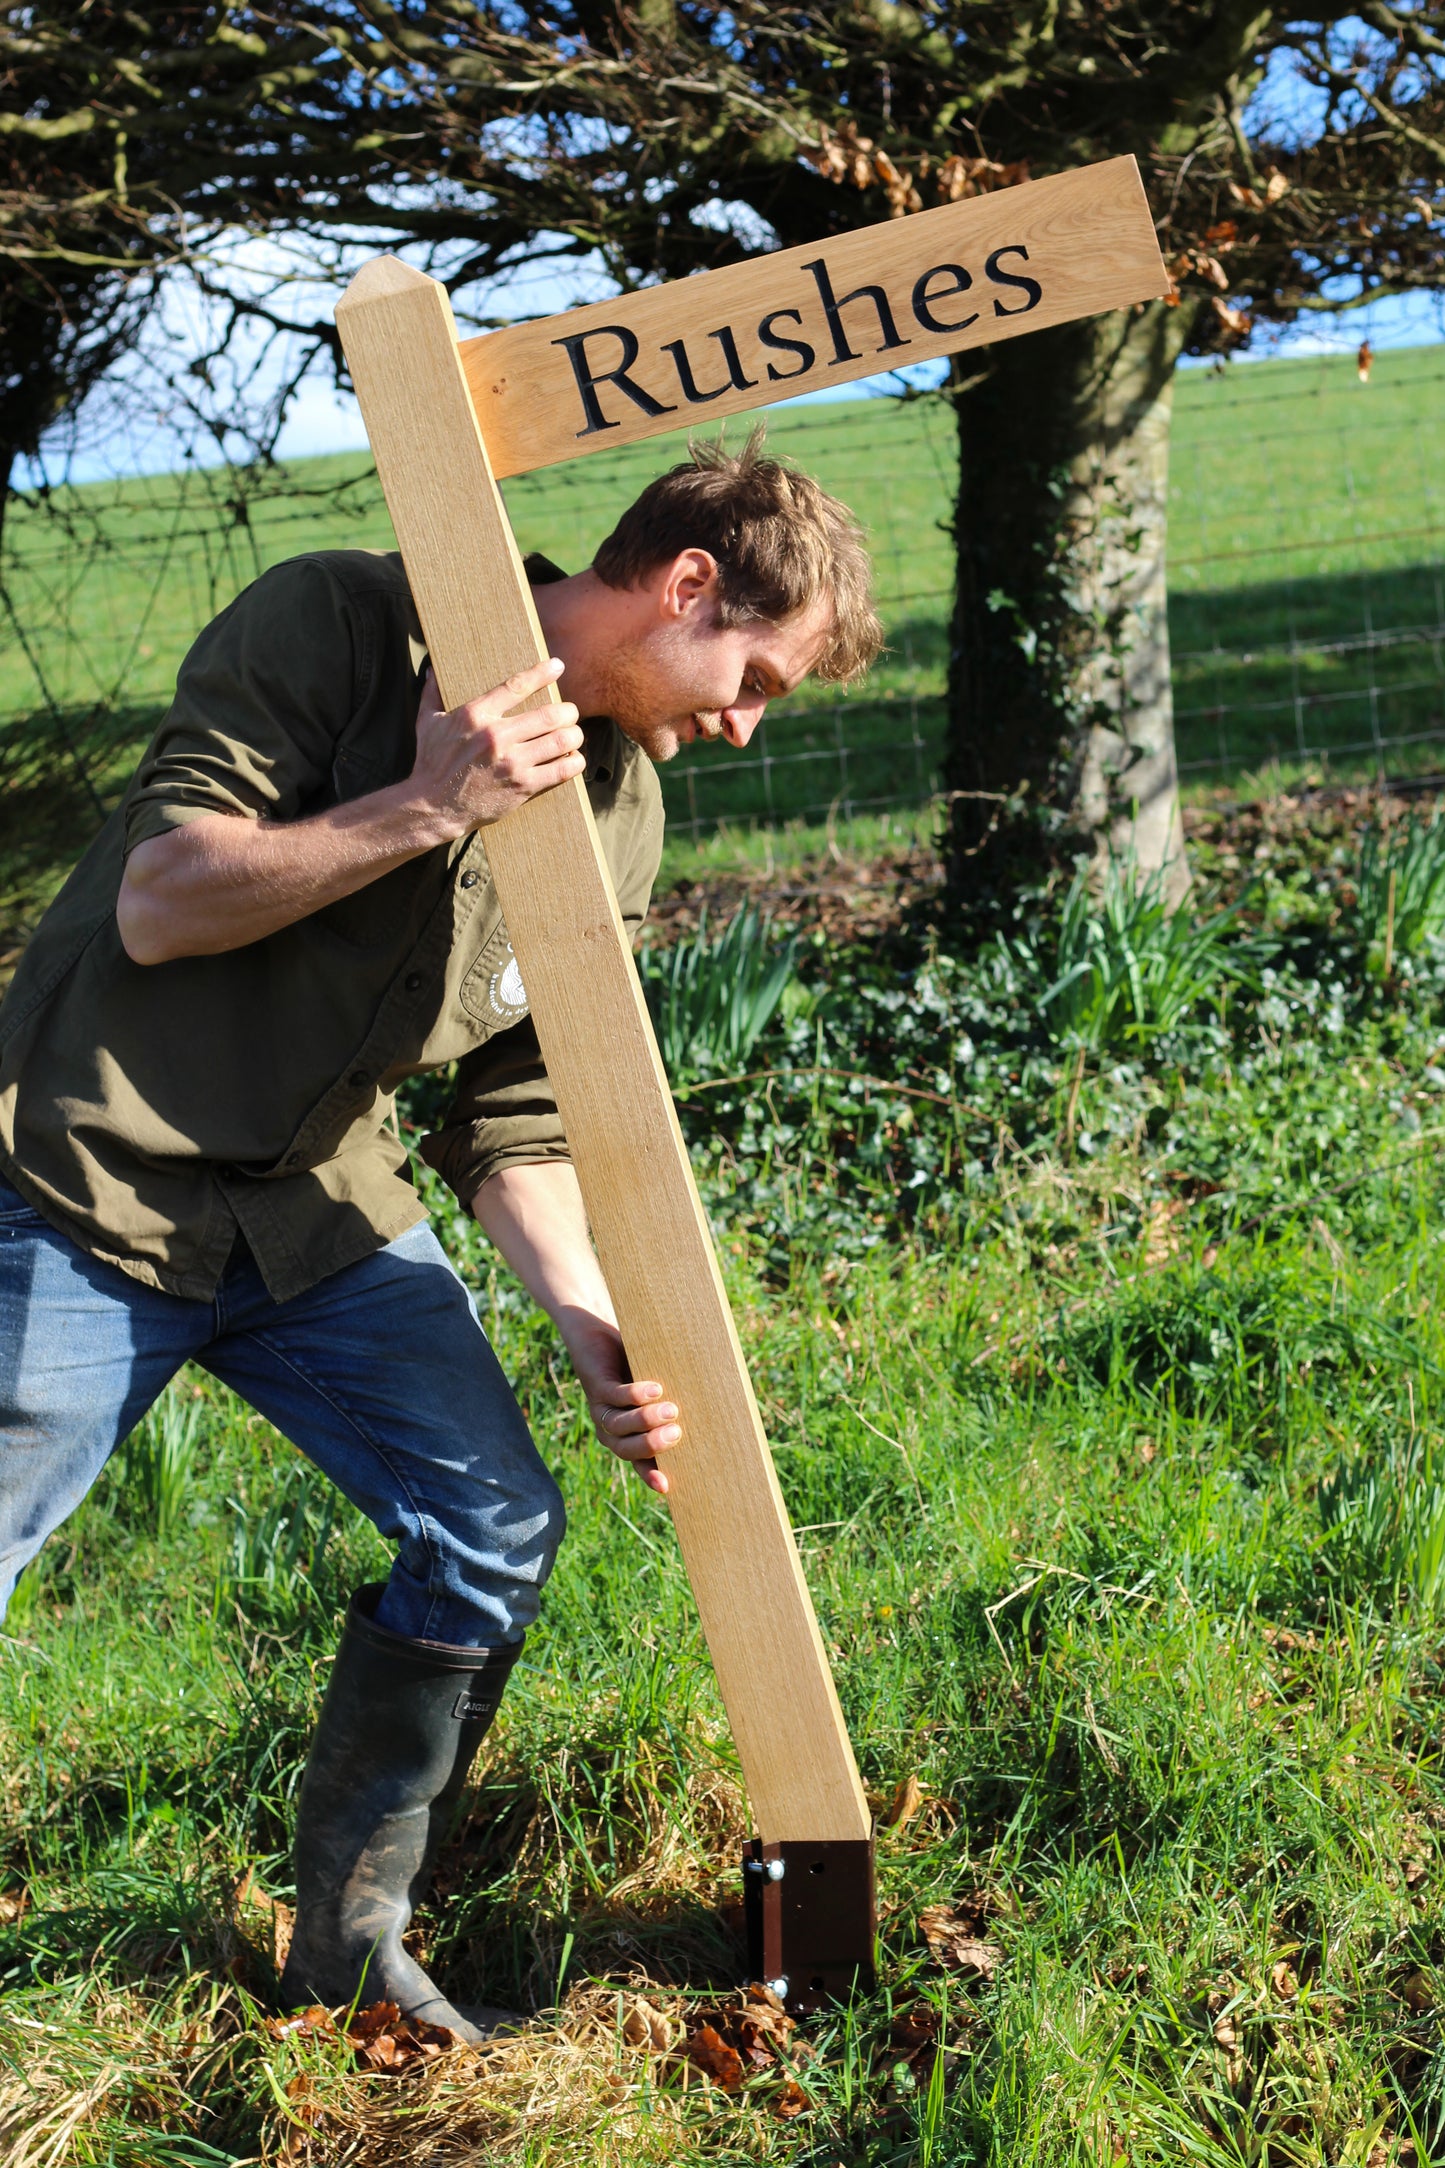
Secure the Wooden Post(s)
- Slide your post(s) into the spike(s), ensuring a snug fit.
- Use the provided bolts or screws to secure the post in place.
- Tighten them firmly with a screwdriver for added stability.
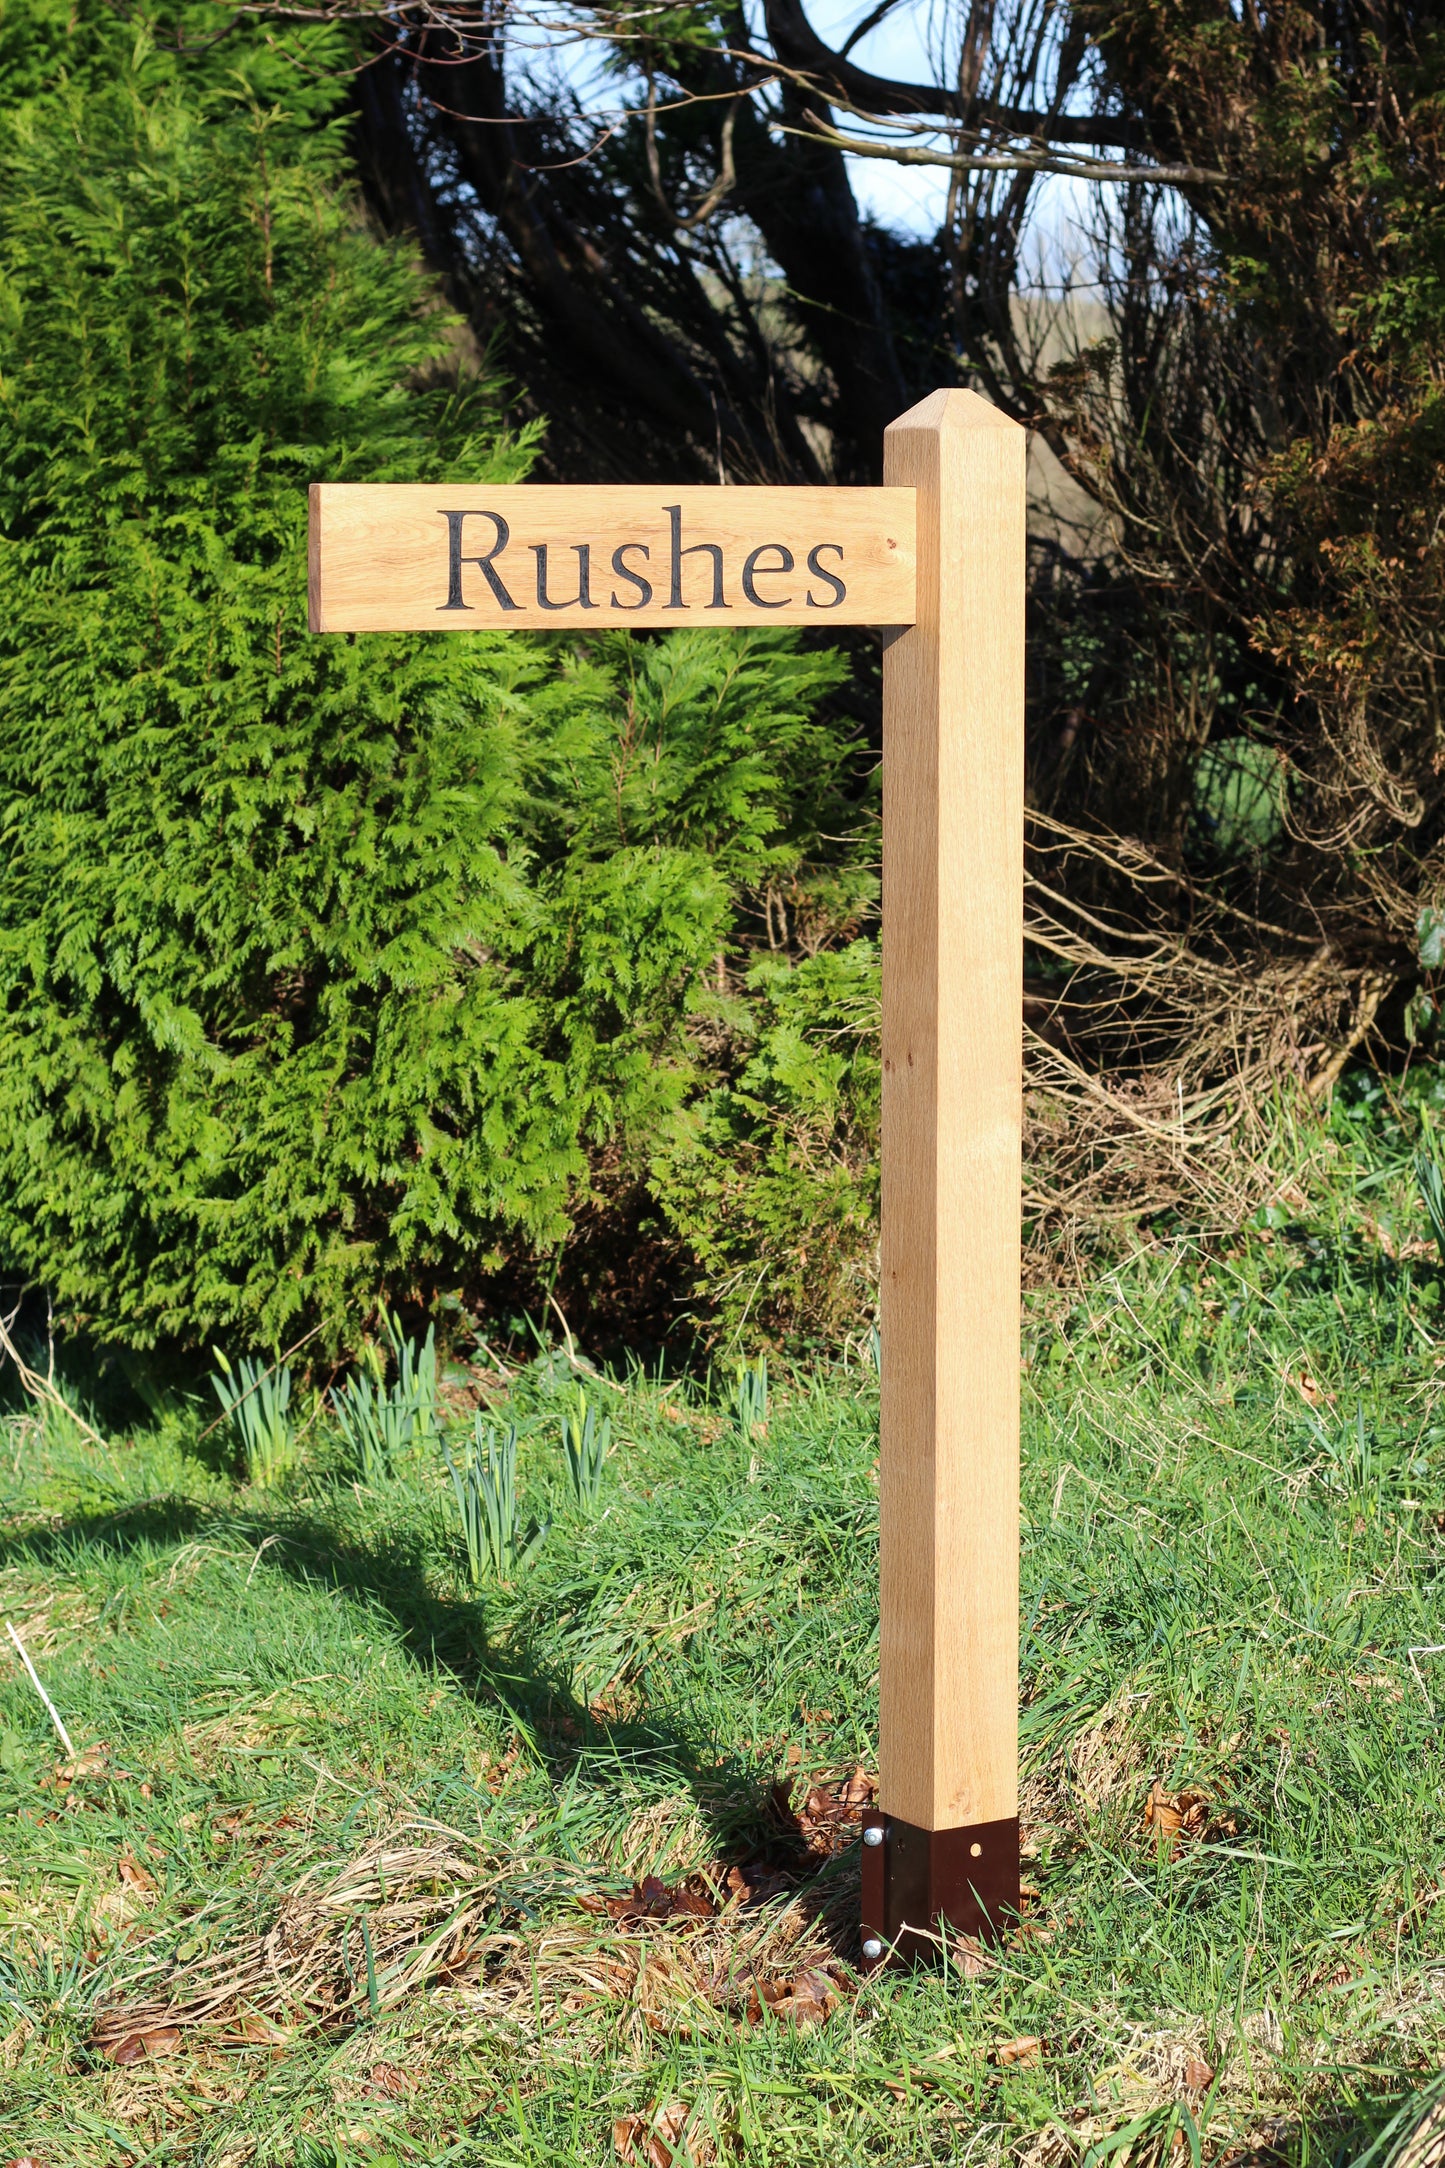
Now your wooden post installation is complete and ready for use! 🌿🔨
Please note: Our ground spikes are designed to fit specific leg sizes. If you're purchasing spikes separately after your original order, the leg dimensions of your sign may need adjusting to ensure a proper fit. Feel free to reach out if you're unsure or need assistance!
Maintaining your sign
Delivery times
Once you're happy with the design, it takes 7-13 working days (depending on the shipping option you choose) to create the product by hand, before being sent out with Parcelforce on a tracked UK shipping service.
See our Shipping Policies for more details.
Share
Shipping Information
Shipping Information
Once you’ve placed your order, we’ll be in touch with a selection of design options for your approval. As soon as your design is confirmed, we’ll begin the engraving and build process.
Please allow around 15 working days for production. Lead times can vary depending on the product, with simpler items often completed sooner and larger signs taking a little longer. Estimated production times will be shown at checkout, and you can also refer to our Shipping Information page for further details.
If you’ve selected an Osmo treatment, please allow an additional 2 working days for treatment and drying time.
Once your order is complete, it will be shipped via UPS using a 2–3 working day delivery service.


Let us make your ideas a reality

Handcrafted in our Devon Workshop
Using sustainably sourced Dartmoor Oak, from the initial enquiry to the final installation, we will be here to help every step of the way!
"Every oak tree started as a couple of nuts that stood their ground"
After Care
About Oak
Wood is a natural material that naturally responds to changes in temperature and humidity by expanding and contracting. While these shifts are typically minor, you may notice small hairline cracks over time—this is a natural characteristic that adds to the wood’s unique charm. Seasonal changes can also cause slight movement in the timber, which is completely normal and expected as part of its aging process.
After Care
Regular care is essential to keep your product in top condition. We recommend treating the wood with Danish oil or a similar timber treatment to nourish and protect it. This helps prevent drying out, discoloration, staining, cracking, and warping, ensuring its longevity and beauty over time.
To learn more head to our blog on how to properly maintain and care for you outdoor product: Click here to learn more!
Please don't hesitate to contact us with any queries!
FAQ's
Can I approve my design before you begin engraving?
Absolutely! We’ll never engrave anything until you’ve confirmed the design. After your order, we’ll email you design options for approval. Feel free to share any preferences, and we’ll refine the design until you’re completely happy. No engraving will take place until you give the final confirmation.
How do I choose my font?
We can engrave nearly any font. We’ll provide a range of font options for you to choose from. If you have a specific font in mind, just mention it in the additional instructions, and we’ll include it. You can also let us know your style preferences, and we’ll tailor the choices accordingly. If you’re unsure, we’ll still provide a variety for you to pick from.
How do I choose the colour for my engraving?
Choosing an engraving colour comes down to both aesthetic preference and how the product will be used.
- White offers the highest contrast, making it ideal for clear visibility.
- Black is a more traditional option that still provides strong contrast.
- Natural / unpainted engravings suit interior and household décor items best, rather than signage.
- Reflective paint has a subtle silver tone and contains light-reflecting pigments, giving it the best visibility at night. This works best with bolder fonts, which will be reflected in the available design options.
You can read more about reflective finishes in our blog post.
If you have a custom colour in mind, please get in touch — we’re always happy to source a specific finish for you.
How do I add a logo or emblem to my order?
Once your order is placed, we’ll be in touch shortly via email to discuss your design. However, it’s very helpful if you can email your logo or emblem to us as soon as possible so it can be included in the initial design concepts.
Please send your image to info@graindesigns.com.
If your emblem or logo is particularly detailed or intricate, there is a chance it may not translate fully when engraved. In these cases, we recommend emailing it to us before placing your order — we’re happy to review it and provide proofs so you can be confident the final result meets your expectations.
What if I’d like different dimensions or a design that isn’t shown in the listing?
No problem at all — many of our products are made completely to order. Whether you’re looking for different dimensions or have a fully custom design in mind, we’d love to hear your ideas.
You’re welcome to explore our Inspiration page and existing product range for ideas, then get in touch to tell us what you’re looking for. We’ll be happy to help refine your concept and bring it to life.
How long does production and delivery take?
Our standard build time is 8–15 working days, depending on current demand. The most up-to-date lead times are always shown in our Shipping Policy.
If you need your order sooner, you can select Express Delivery at checkout for priority production. Once dispatched, delivery typically takes 1–2 working days.
As all items are handcrafted, some processes naturally take time, but we always work to complete and ship orders as quickly as possible without compromising quality.